Calendar - Get Started
Requirements
The following scripts are required to use Calendar and all related functionality covered in the Calendar guides:
scCalendarscDayViewManagerscWeekViewManagerscMaintenancescNavscSubNavscDatabasescLinkingscPlatformscPrototypesscThemesscUsersscAlertscQuickSort
The Calendar is available in the main menu under Calendar. It opens in month view and loads events and maintenance deadlines for the current period automatically.
Views
The calendar has three view modes. Switching between them is done directly in the calendar:
- Click a month tab at the top to switch to month view for that month.
- Click the background of a day to switch to week view for that week.
- Click an event to switch to day view for that day.
- In week view, click the day name to switch to day view for that day.
Use the arrow buttons in the top bar to move forward or backward one period at a time.
Month
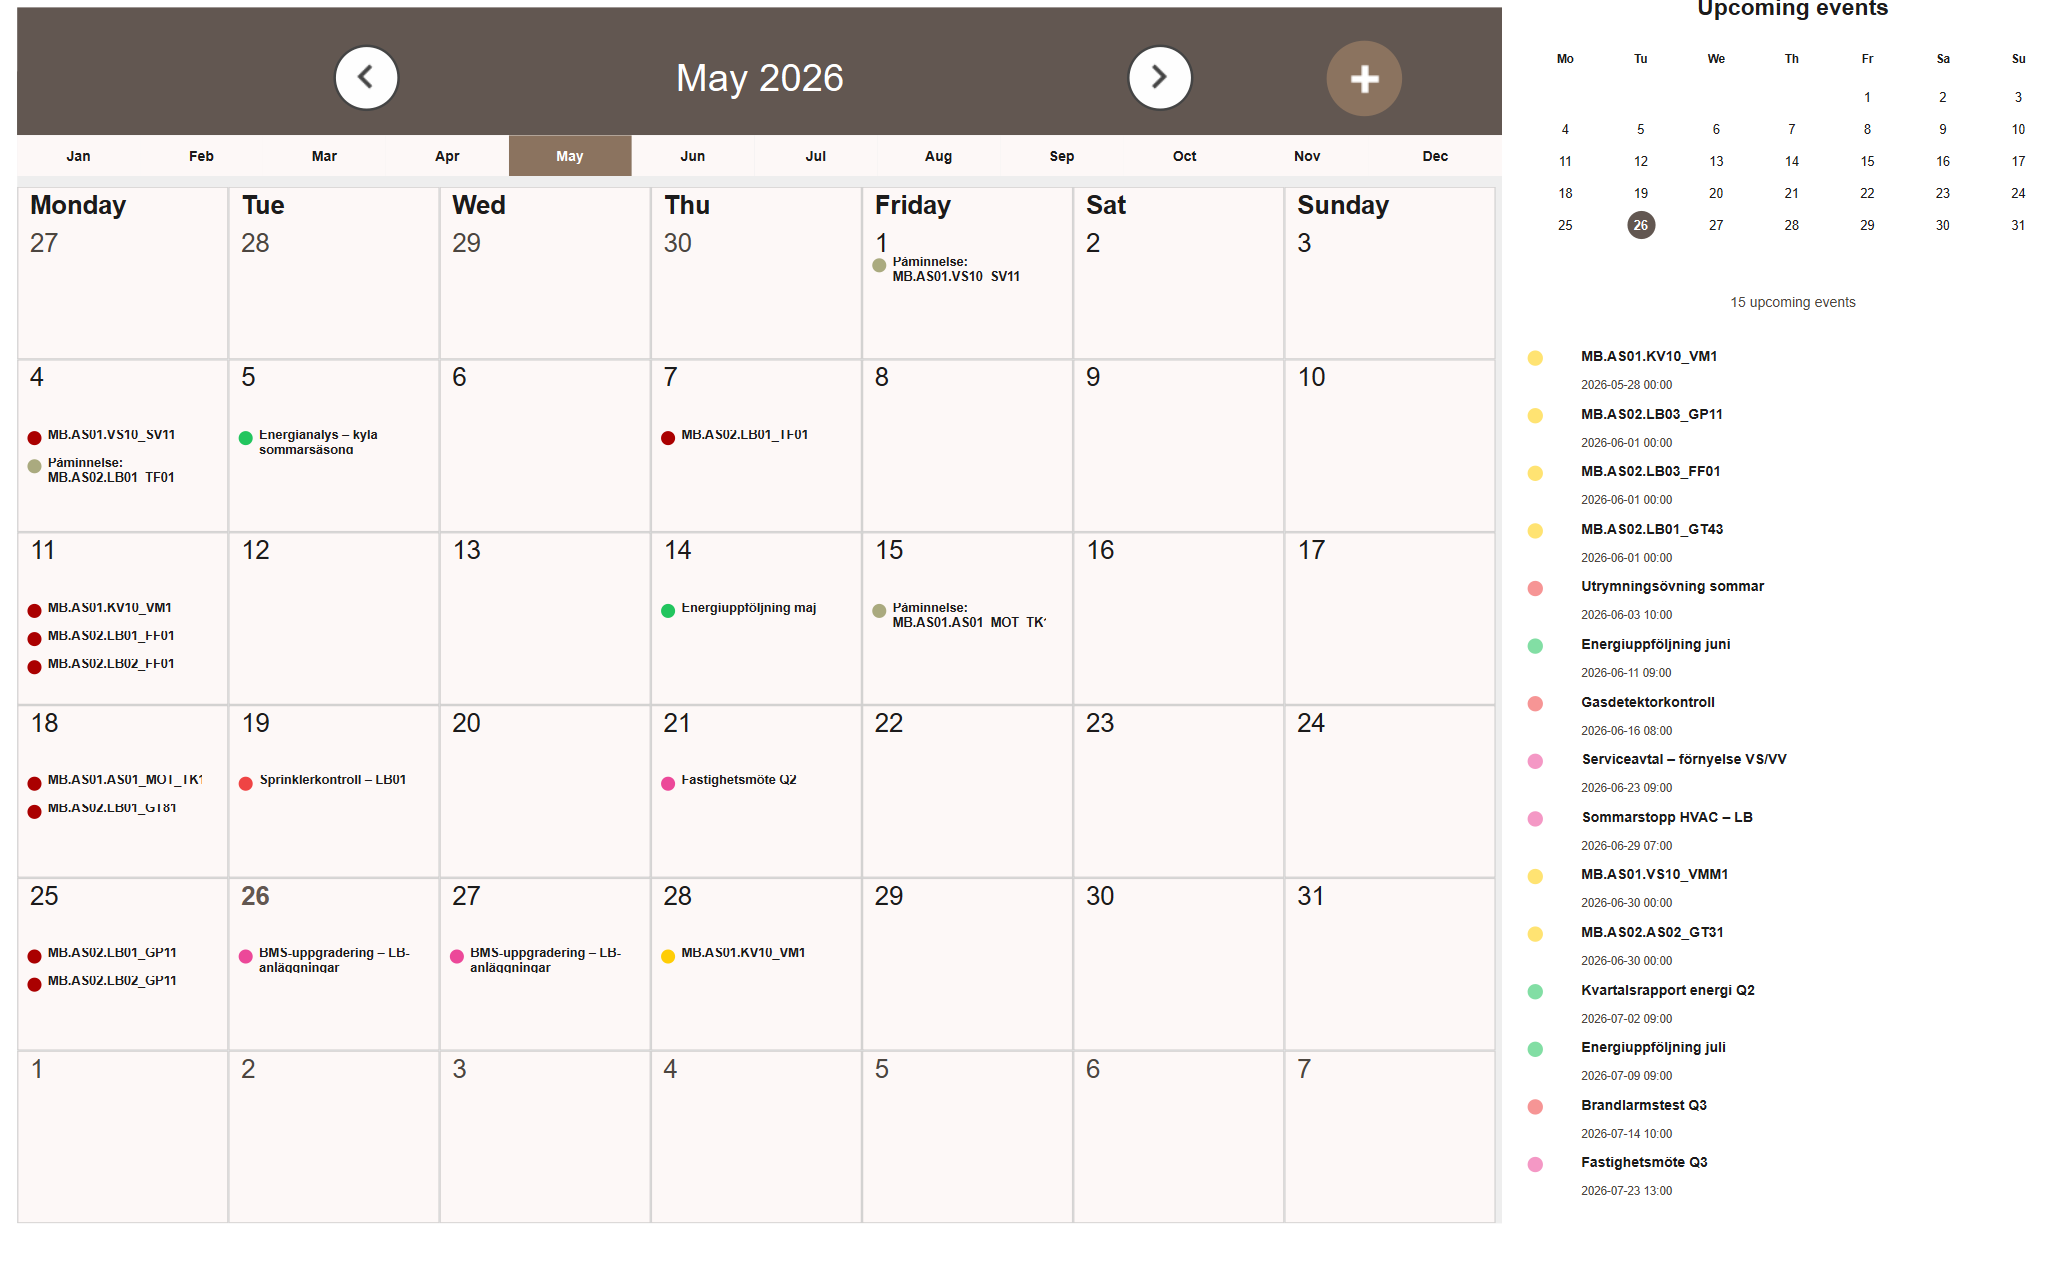
The month view shows a full calendar grid for the current month. Events appear as colored indicators on each day.
When a day holds more events than its cell can show, the remainder are not drawn in the cell at all. Instead a Show more (N) badge reports how many are not shown. Clicking the badge opens the Day view for that date, where every event of the day is visible.
Week
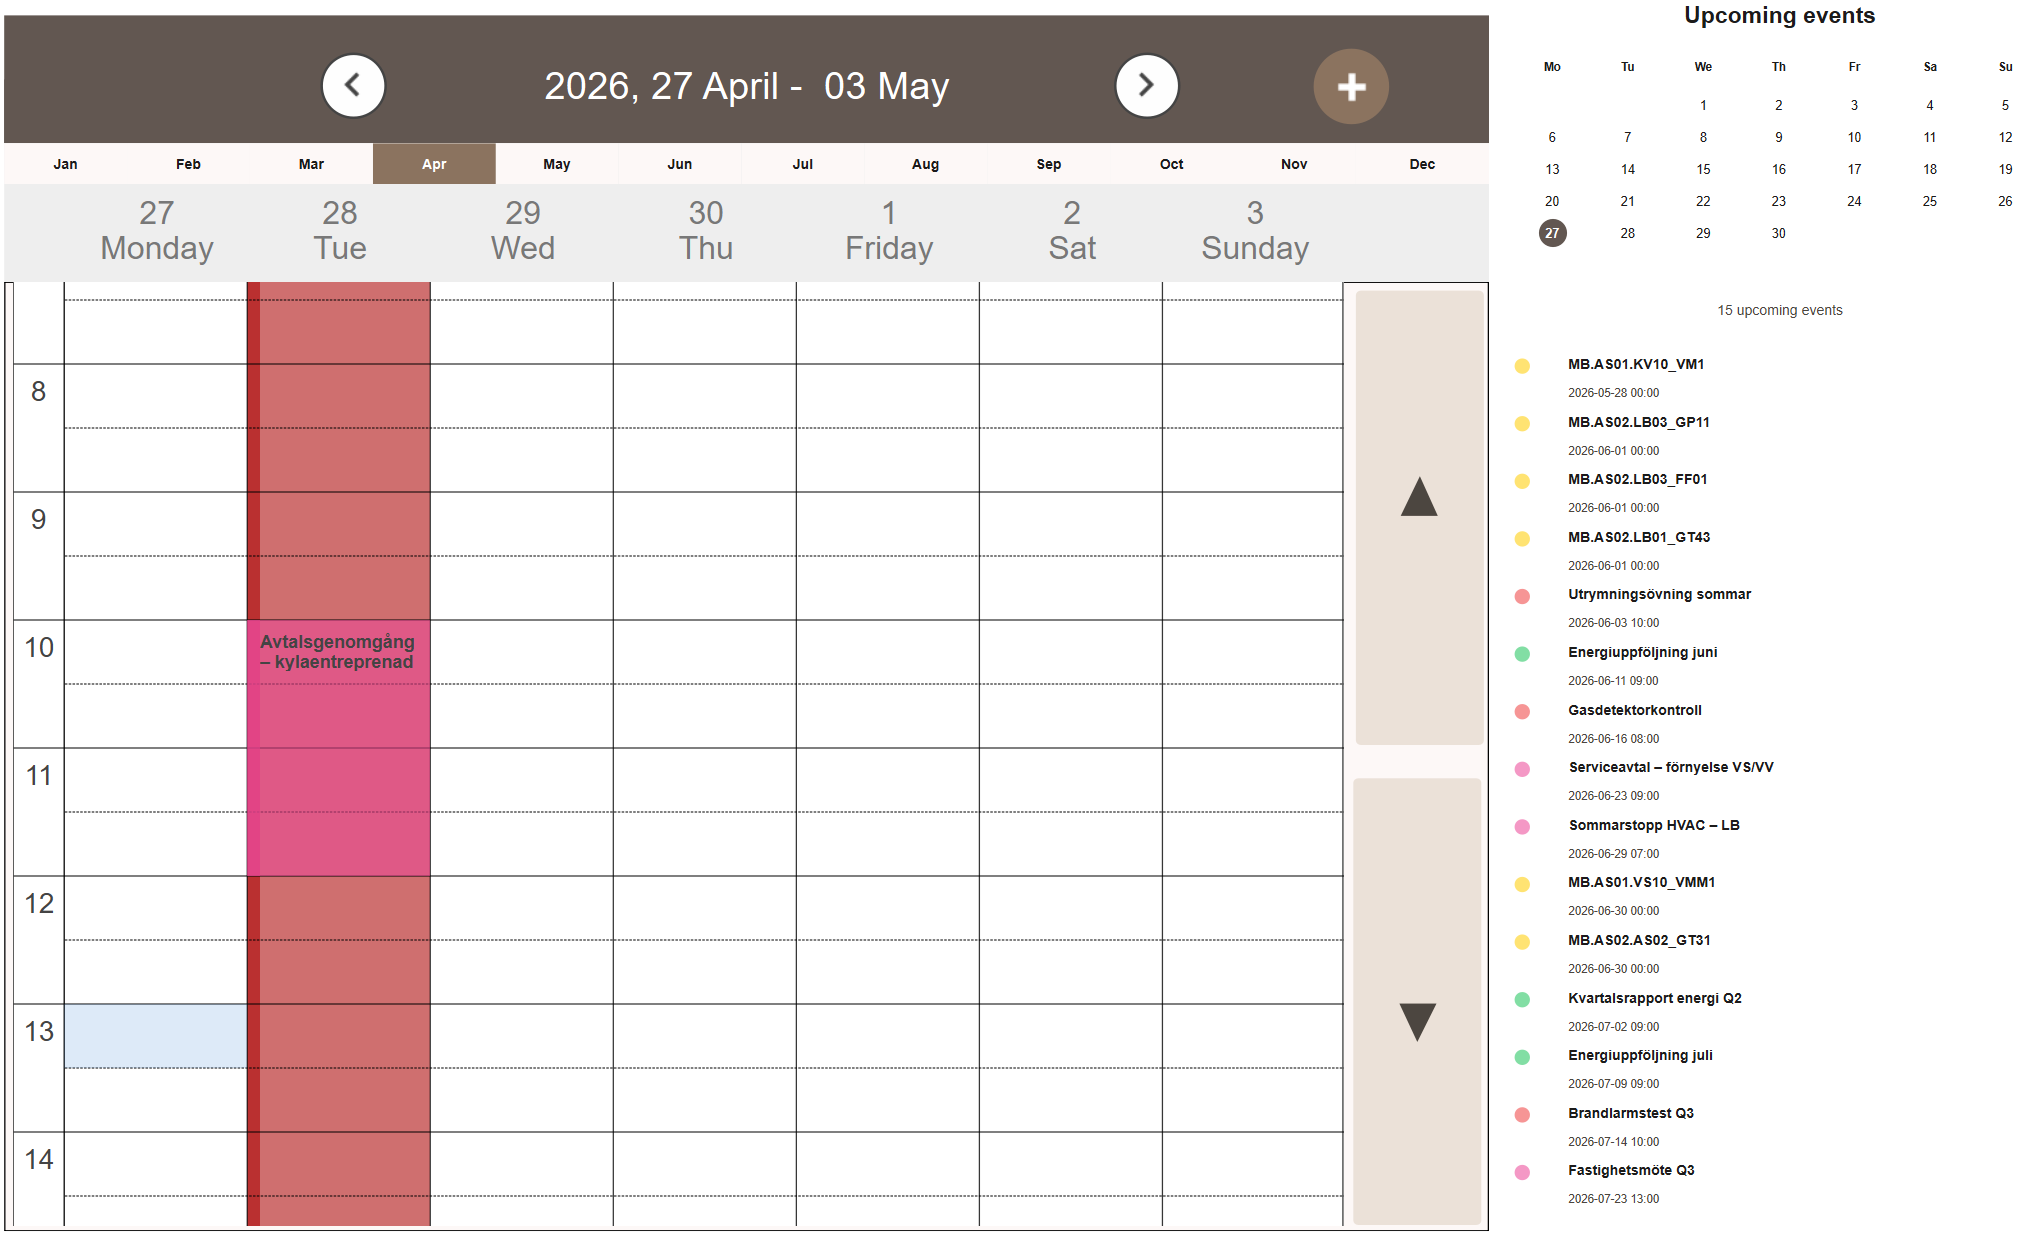
The week view shows the current 7-day period as a time grid. Events are rendered as blocks with their start and end times visible.
Events that share an identical span would otherwise be drawn as stacked bars with their names on top of each other. A column holding more than one event is therefore collapsed into a single bar labelled Show events (X). Clicking it opens a picker listing every event the bar stands for.
Day
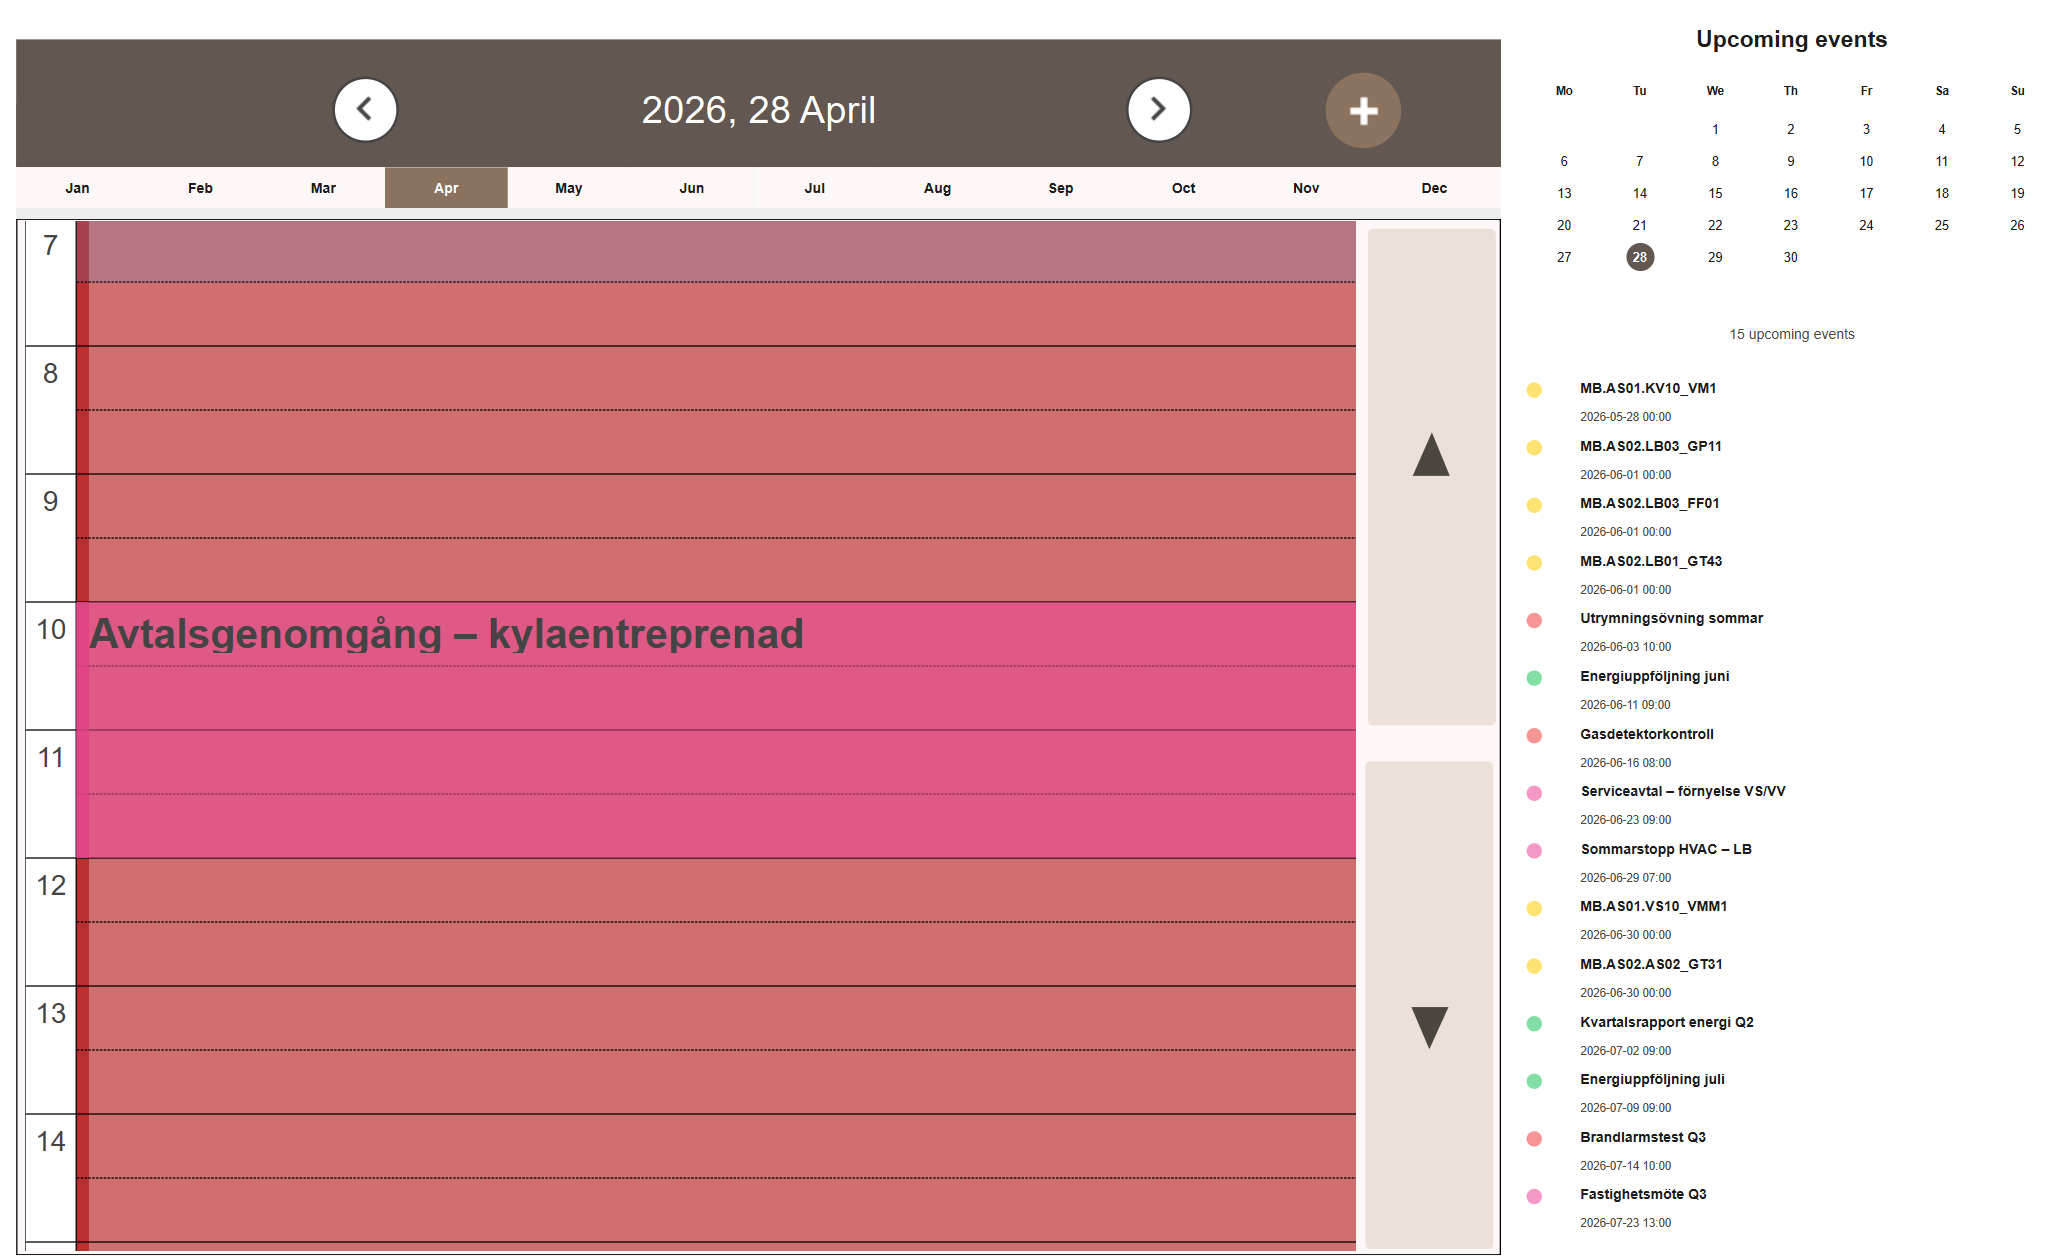
The day view shows a single day as a time grid. It works the same as the week view but focused on one day at a time.
Sidebar
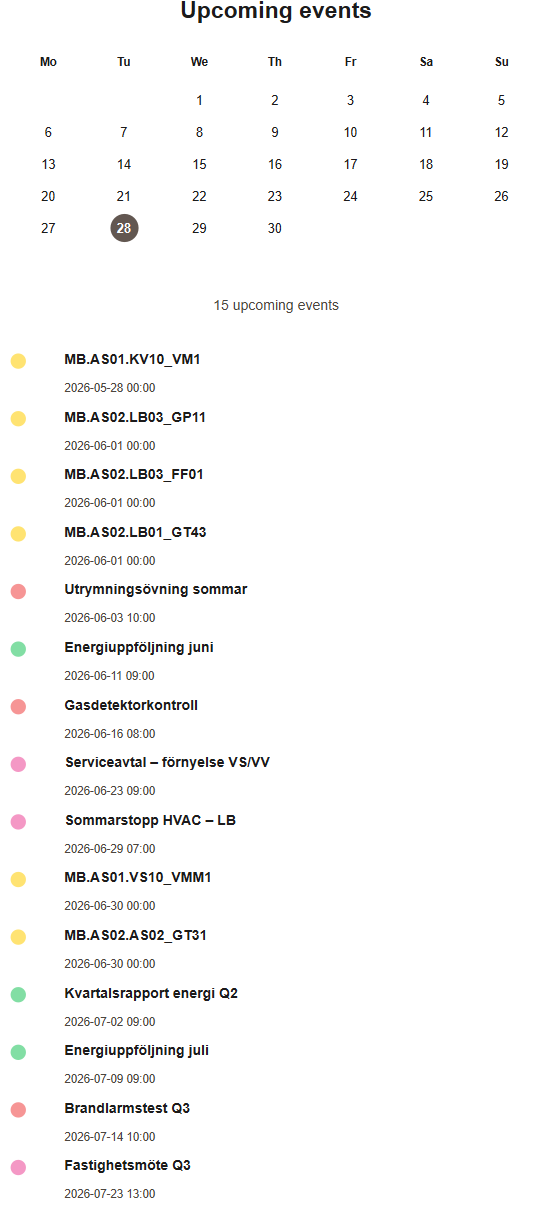
The sidebar shows two things: a mini calendar for the current month and a list of upcoming events.
The mini calendar highlights the currently selected day.
The upcoming events list shows the next events and maintenance deadlines sorted by date, merging both event sources into a single list.
Creating an Event
New events can be created in two ways:
- Click + in the top bar to open the Add/Edit Calendar Event popup directly.
- In Week or Day view, click once on the time grid to set the start time, then click again to set the end time. The popup opens with Start and End pre-filled.
Fill in the fields:
- Title — a short label shown on the event.
- Start and End — the date and time of the event. Can be adjusted after opening the popup.
- Color — sets the display color of the event in the calendar. HOLIDAY and HOLIDAYEVE also mark the day, see below.
- Category — groups the event under a named category.
- Description — optional additional details.
Click Save to add the event to the calendar.
Marking a holiday
Choosing the colour HOLIDAY or HOLIDAYEVE does more than change how the event looks. It marks the days the event covers as a holiday or a holiday eve, which the calendar publishes to an internal variable that a control system can read. An event created with either colour is snapped to whole days automatically, since a day is either a holiday or it is not.
See Holidays and Holiday Eves.
Next Steps
- Configuring — editing events, maintenance colors and reminder settings
- Extending — troubleshooting